Google Drive announced last year that it will be deprecating the web hosting feature by August 31, 2016. That’s a few days from now. It means that the once very useful URL, googledrive.com/host/[id], will cease to exist. And it also means that I’ll lose my blog’s image host. 🙁
As you may remember, sometime ago, I decided to move my blog’s images to a Google Drive for several reasons – it’s easier to manage the images, and it’s less likely to lose the images from jumping from one hosts to another, since it’s in a cloud storage. So now that GD is shutting down the web hosting feature, I wont have anyway to hotlink to my images. But the other day, as I received an email reminder of the same content from the Google Apps Team, I read somewhere there about Firebase Hosting.
So I went and checked around Firebase. Firebase is a cloud service provider that software developers can use to create their web applications to. In short, it’s like Google App Engine, but better. I tried playing around with it yesterday morning before I went to sleep. It’s pretty straightforward and easy to use.
The first thing I went and look for was the Pricing. Because I’m a cheap ass and I need it to be free, or at least, really cheap.
Since I only cared about the hosting part, I ignored the rest of it. But if you’re interested, here are the full specs for “Spark” a.k.a. Free:
Included Free
Analytics, App Indexing, Authentication, Dynamic Links, FCM, Invites, Notifications, Crash Reporting, & Remote ConfigRealtime Database
Simultaneous connections 100
GB Stored – 1 GB
GB Downloaded – 10 GB
Daily Private Backups – XFile Storage
GB Stored – 5 GB
GB Downloaded – 30 GB
Uploads & Downloads 50,000 eachHosting
GB Stored – 1 GB
GB Downloaded – 10 GB
Custom domain hosting & SSL – ✔
After I decided on a plan, which is free, I simply followed everything in the Firebase Hosting Documentation, literally. But if you’re interested, I’ve put up a step by step below.
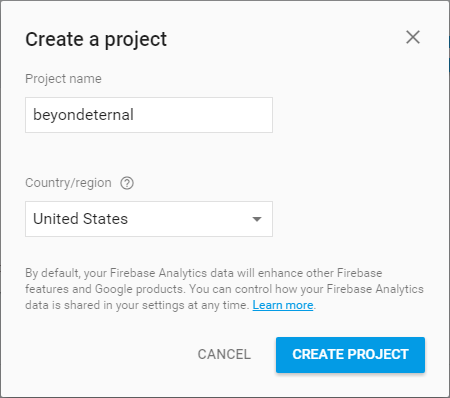
Step 1: I created a new project at the console page.

Step 2: Then, I downloaded NodeJS, and open the command line to the folder where I installed it. In my case, it is: C:\nodejs

Step 3: In the same command line, I ran: firebase login
- If it’s getting an error that says something like “Error: Cannot run login in non-interactive mode. See login:ci to generate a token for use in non-interactive environments.” Do this:
firebase login --interactive
It’s suppose to install a lot of Firebase stuff.
Step 4: Then, type: firebase login
Your browser will popup to Google Accounts where you’ll need to authenticate, just choose “Allow”

Step 5: Create a folder for your project. In my case, I will have my project folder in: C:\projects
Step 6: Back to the command line, go to the directory where your project is, and there, type: firebase init

Step 7: Are you ready to proceed? (Y/n)
Type: Y.
Step 8: What Firebase CLI features di you want to setup for this folder? (Press <space> to select)
Choose: Hosting Configure and deploy Firebase Hosting sites.
- Just press <space> to the first one to remove the asterisk in it (*) and continue by pressing enter.

Step 9: What Firebase project do you wan to associate as default?
Choose the Firebase project you created earlier in Step 1.

Step 10: What do you want to use as your public ? (public)

You can type a new directory or simply press enter to use the default, “public.” I used the default.
Step 11: Configure as a single=page app (rewrite all urls to /index.html) (y/n):
In my case, I typed: Y.
It will then create a firebase.json file and a .firebaserc in your C:\projects folder
Step 12: Edit your index.html file and save.
Step 13: On the command line again, type: firebase deploy

And it’s done! 🙂
The only drawback for me here is that I have a lot of files and it takes a while to firebase deploy each time I upload something new. This is because Firebase compiles your files to tar (source).
I’ll try to look for a different alternative, but for now, Firebase is great!


